- December 19, 2021
- by Cindy Williams
- 0 Like
- 0 / 5

-
Prep TimeAll Day
-
Cook Time20 to 30 minutes
-
View800
THINGS I HAVE LEARNED THE HARD WAY ABOUT MAKING PUFF PASTRY:
- Don’t rush this process; this is not the short-cut version. This requires patience.
- Keep everything cold until you pop that pastry into a hot oven.
- Don’t over work the dough. You will toughen it up if you do.
- Have what you need and have it ready: dough scraper, rolling pin & pastry brush.
- Sift the flour before you measure it.
- Read lots of puff pastry recipes before you start – know what you’re doing and why.
MADELINE KAMMAN’S DIRECTIONS FOR PUFF PASTRY ARE THE BEST
Madeline Kamman was the quintessential French cook. She was scrupulous about technique, a perfectionist, a task-master, and a great teacher. If you are serious about puff pastry, read her instructions in The Making of a Cook (1997). Her 2018 obituary is worth reading, too. Here is an excerpt from The New York Times article by Richard Sandomir, July 20, 2018.
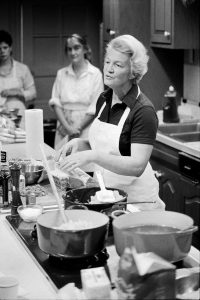
Ms. Kamman thought herself the more authentic French chef and was prickly in her estimation of the American-born Ms. Child.
“I am French,” she said when interviewed by The Times in 1982. “Why would they want an American French chef?”
It was not much of a feud, though. Ms. Child did not return much fire and eventually Ms. Kamman mellowed toward her rival.
“Julia made things look effortless and forgiving if a chicken fell on the floor, and Madeleine was more a taskmaster who was much more serious and did not have a public lightness,” Gary Danko, another former student of Ms. Kamman’s and a chef who owns Restaurant Gary Danko in San Francisco, said in a telephone interview. “But I would have to say that Madeleine was a better cook.”
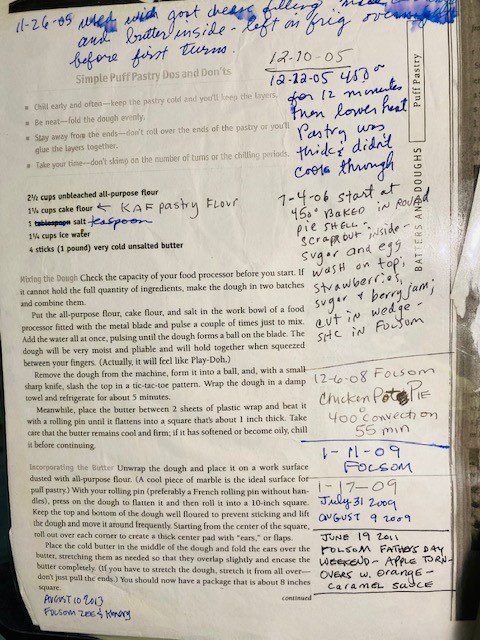

Ingredients
Directions
This is classic Puff Pastry, not the "rough" pastry that is much easier and takes less time.
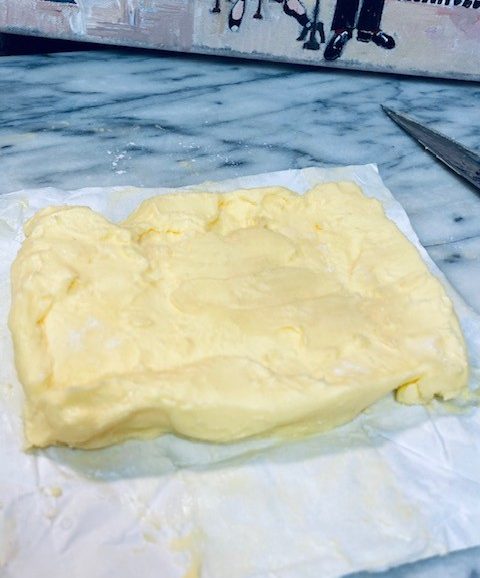

Prepare the butter slab aka the beurrage: When you've got 2 sticks at just above room temperature, flatten it into a square about 4 x 4 inches. You can do this with your wooden rolling pin. Put it back in the frig for 30 minutes.
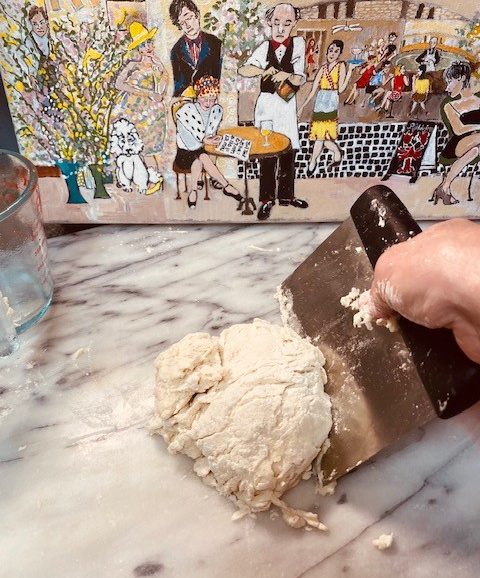

Prepare the detrempe. The detrempe is the dough portion made of flour, water and a small amount of butter. To make it, put the sifted flour and salt in a bowl and mix with a fork. Then dump the flour on your cold marble work area and make a well in the middle with your fingers. Start adding the iced water and with your fingers incorporate the water into the flour until you have a shaggy ball. This will not be a pretty dough - and don't be tempted to make it into one. You do NOT want to knead this dough because if you do, you will have a tough pastry. Use your dough scraper to bring it together in a rough lumpy ball then wrap it loosely in some Saran wrap and refrigerate for 30 minutes.
Take your beurrage and detrempe out of the frig. Flour your rolling pin and dust your work surface with flour. Roll out the detrempe so that you have a 5 x 6 inch square with longer flaps on four sides. Put the butter in the middle and enclose the butter with the dough flaps and press it all into a somewhat neat square shaped packed, with the butter enclosed. This should be about a 5 x 5 or 5 x 6 inch butter enclosed package, called a paton.
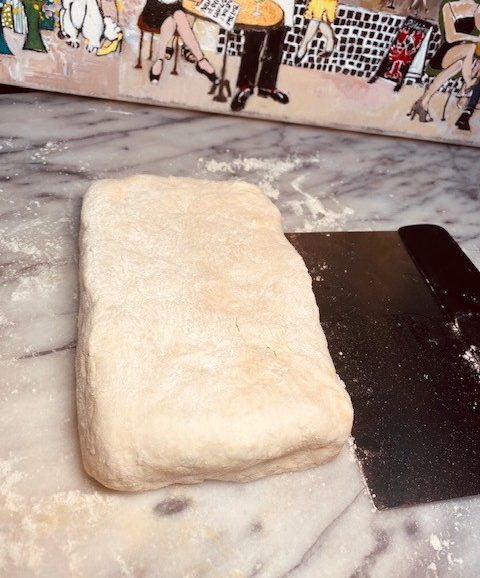

Take your rolling pin and pat the paton a few times to even it up on all sides. Now you are ready to roll! Roll the paton out to a strip that is about 5 inches wide and 16 to 18 inches long. You want to keep it about 1/2 inch thick if you can.
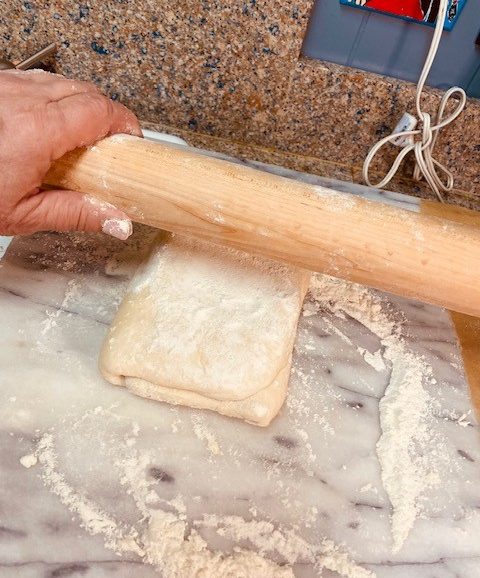

A word about your rolling technique. Start at the middle of the paton and roll upward in one long stroke. Then, come back to the middle and roll down. Don't roll side to side. Don't widen the paton. Don't roll back and forth. You want that butter to move parallel to the work surface in one sheet.
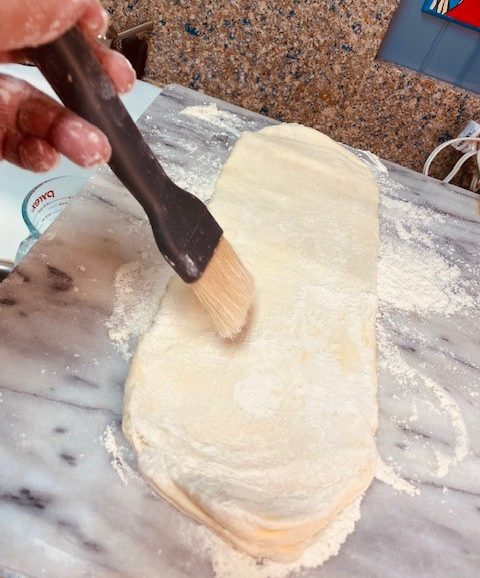

Keep your dough and rolling pin floured. But when you get ready to fold the dough, take your pastry brush and brush off excess flour.
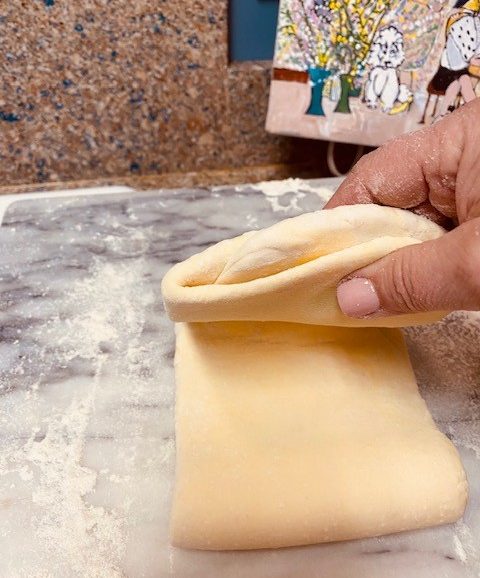

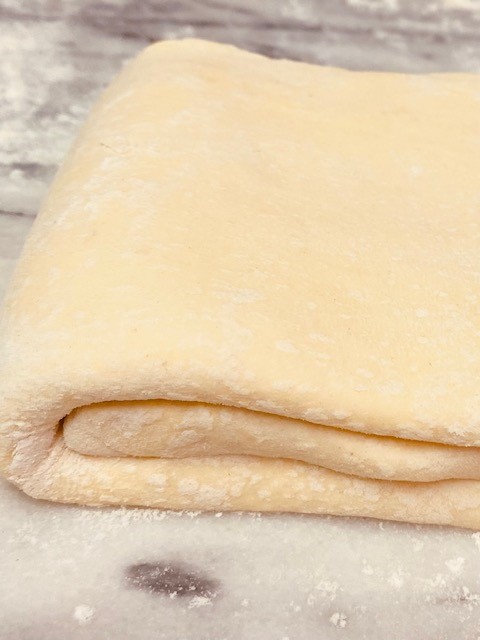
You're ready to do the first fold. Bring the lower third of the dough up to the middle of the strip. Then fold the top third over the bottom third. Fold it like you're folding a letter. Then -- pretend your paton is a book -- and turn it so the pages are on the right. Every time you start to roll out your paton, the book spine is on the left and the pages are on the right.
Roll the paton out again, flouring when necessary to keep the butter from peeking through, then brushing the excess flour off before folding. Fold for the second time; rotate your book pages to the right. Wrap in Saran wrap and refrigerate for an hour.
Remove from frig. Make two more "turns."
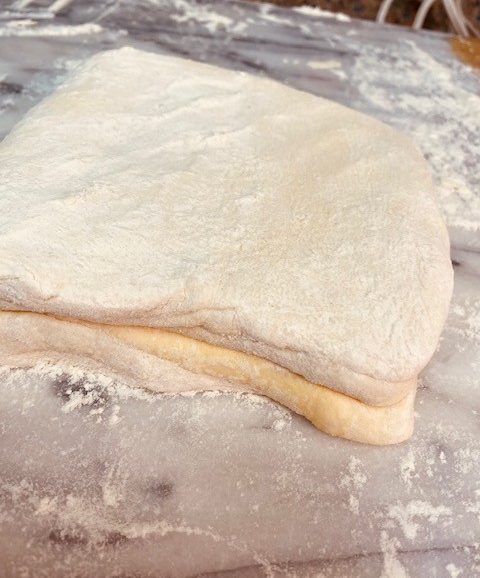

After the fourth turn, make a half turn. To do this, just fold the paton over once, bringing the edges together, instead of the letter fold. Put the paton back into the refrigerator for at least an hour.
Two more turns, then back in the frig for 24 hours.
Now you can roll out your puff pastry into a thin sheet about 1/4 inch thick.
To bake off your pastry: Cut into desired shapes. Flip the dough over onto a sheet of parchment on a cookie sheet. It will rise better that way. Place in a pre-heated 425 degree oven and watch for initial rise. It will puff up incredibly in the first ten minutes. Then, turn down the over to 400 degrees or 375 degrees depending on your recipe.
Conclusion
If your oven door allows a view of your creation as it rises, you can watch the miracle as it happens. Voila! What an achievement when you see (and even hear) the water in the butter and dough turn to steam and puff those little layers heavenward. This is a true labor of love - which is what cooking is all about, right?
You May Also Like


PUFF PASTRY
Ingredients
Follow The Directions
This is classic Puff Pastry, not the "rough" pastry that is much easier and takes less time.
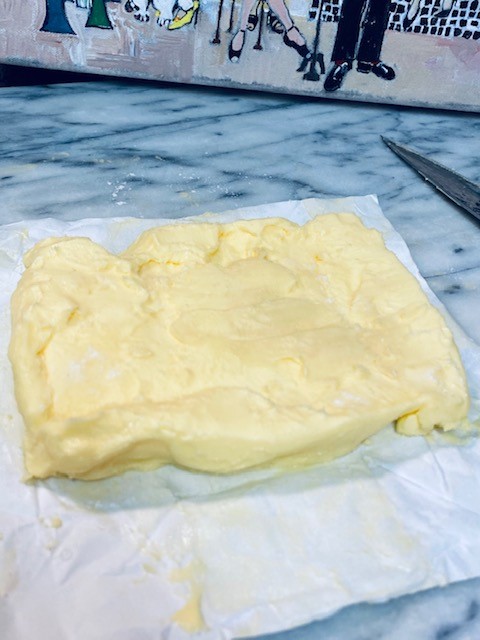

Prepare the butter slab aka the beurrage: When you've got 2 sticks at just above room temperature, flatten it into a square about 4 x 4 inches. You can do this with your wooden rolling pin. Put it back in the frig for 30 minutes.
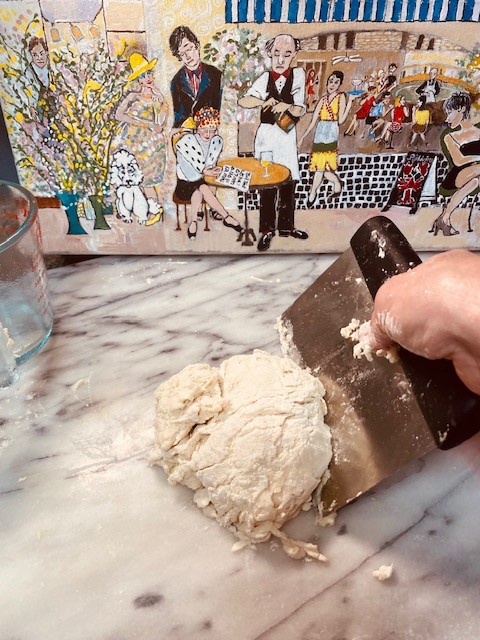

Prepare the detrempe. The detrempe is the dough portion made of flour, water and a small amount of butter. To make it, put the sifted flour and salt in a bowl and mix with a fork. Then dump the flour on your cold marble work area and make a well in the middle with your fingers. Start adding the iced water and with your fingers incorporate the water into the flour until you have a shaggy ball. This will not be a pretty dough - and don't be tempted to make it into one. You do NOT want to knead this dough because if you do, you will have a tough pastry. Use your dough scraper to bring it together in a rough lumpy ball then wrap it loosely in some Saran wrap and refrigerate for 30 minutes.


Take your beurrage and detrempe out of the frig. Flour your rolling pin and dust your work surface with flour. Roll out the detrempe so that you have a 5 x 6 inch square with longer flaps on four sides. Put the butter in the middle and enclose the butter with the dough flaps and press it all into a somewhat neat square shaped packed, with the butter enclosed. This should be about a 5 x 5 or 5 x 6 inch butter enclosed package, called a paton.
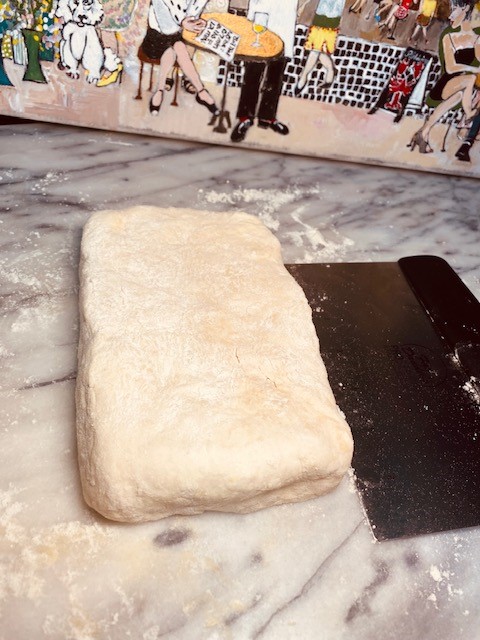

Take your rolling pin and pat the paton a few times to even it up on all sides. Now you are ready to roll! Roll the paton out to a strip that is about 5 inches wide and 16 to 18 inches long. You want to keep it about 1/2 inch thick if you can.
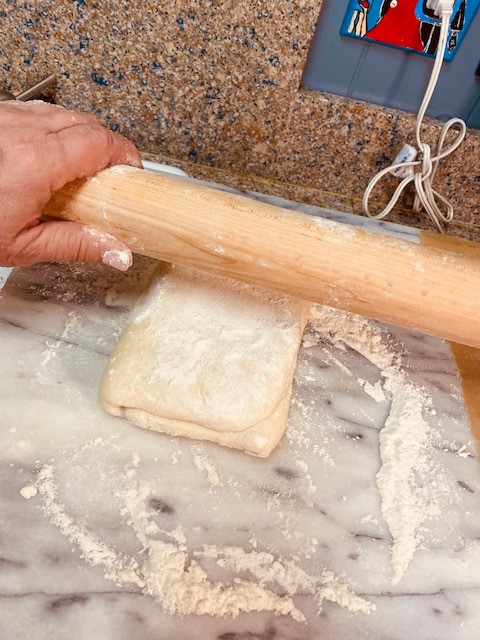

A word about your rolling technique. Start at the middle of the paton and roll upward in one long stroke. Then, come back to the middle and roll down. Don't roll side to side. Don't widen the paton. Don't roll back and forth. You want that butter to move parallel to the work surface in one sheet.
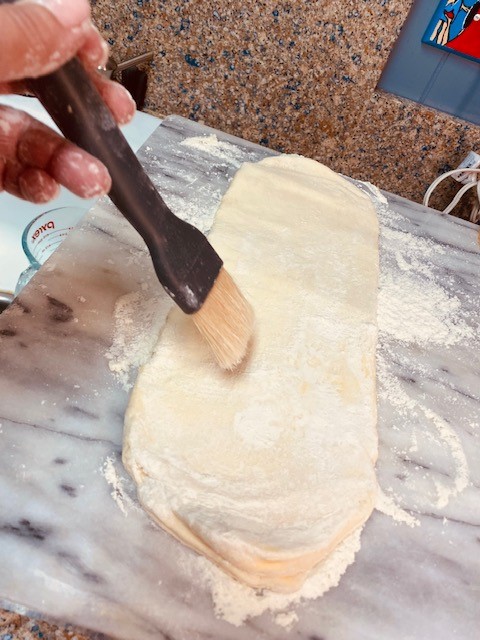

Keep your dough and rolling pin floured. But when you get ready to fold the dough, take your pastry brush and brush off excess flour.
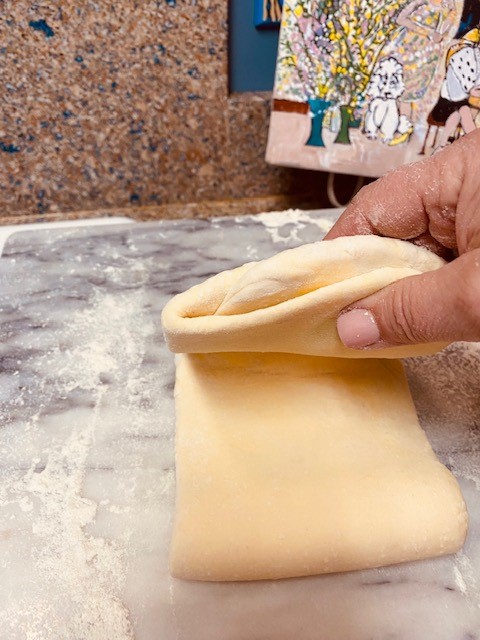

You're ready to do the first fold. Bring the lower third of the dough up to the middle of the strip. Then fold the top third over the bottom third. Fold it like you're folding a letter. Then -- pretend your paton is a book -- and turn it so the pages are on the right. Every time you start to roll out your paton, the book spine is on the left and the pages are on the right.


Roll the paton out again, flouring when necessary to keep the butter from peeking through, then brushing the excess flour off before folding. Fold for the second time; rotate your book pages to the right. Wrap in Saran wrap and refrigerate for an hour.


Remove from frig. Make two more "turns."
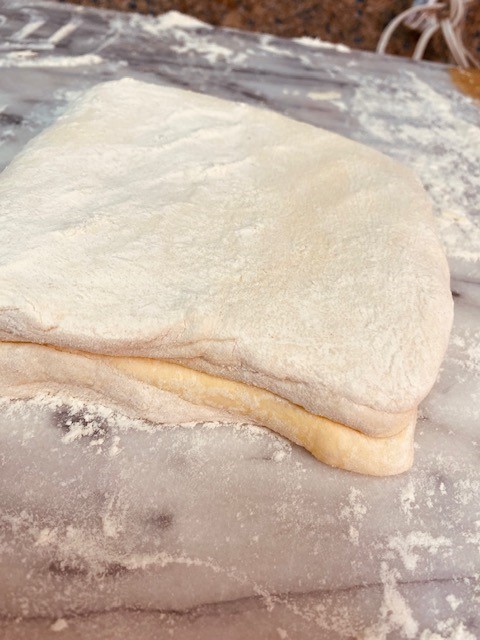

After the fourth turn, make a half turn. To do this, just fold the paton over once, bringing the edges together, instead of the letter fold. Put the paton back into the refrigerator for at least an hour.


Two more turns, then back in the frig for 24 hours.


Now you can roll out your puff pastry into a thin sheet about 1/4 inch thick.


To bake off your pastry: Cut into desired shapes. Flip the dough over onto a sheet of parchment on a cookie sheet. It will rise better that way. Place in a pre-heated 425 degree oven and watch for initial rise. It will puff up incredibly in the first ten minutes. Then, turn down the over to 400 degrees or 375 degrees depending on your recipe.


Leave a Review